Admin Introduction & Account Setup
Read through the post below to learn about the beginning stages of your Awardify setup, or watch the video to see the process. You can also download this post in pdf form: Admin Intro & Account Setup
Welcome to Awardify, when you first log in to your account, you will be greeted with a Welcome screen, which will currently be blank. As you start setting up your account and your Awards Season gets underway, this first screen will show a summary of the activity on your platform.


As an Admin, you have access to all set up features, including the general settings for your season (dates, payment methods and more), customizing your public website, adding awards categories and their corresponding information, and providing information about your Awards Event or Gala.
Each area of setup within Awardify contains links to support documentation or help text, to ensure that you feel confident every step of the way.
One of the first areas to access in your account is the Account Settings. Here you will see a list of primary settings. Set your account name and abbreviation.

The Domains will be set up with your account, no further customization needed here, if you would like a different domain, please let us know and we can set it up!
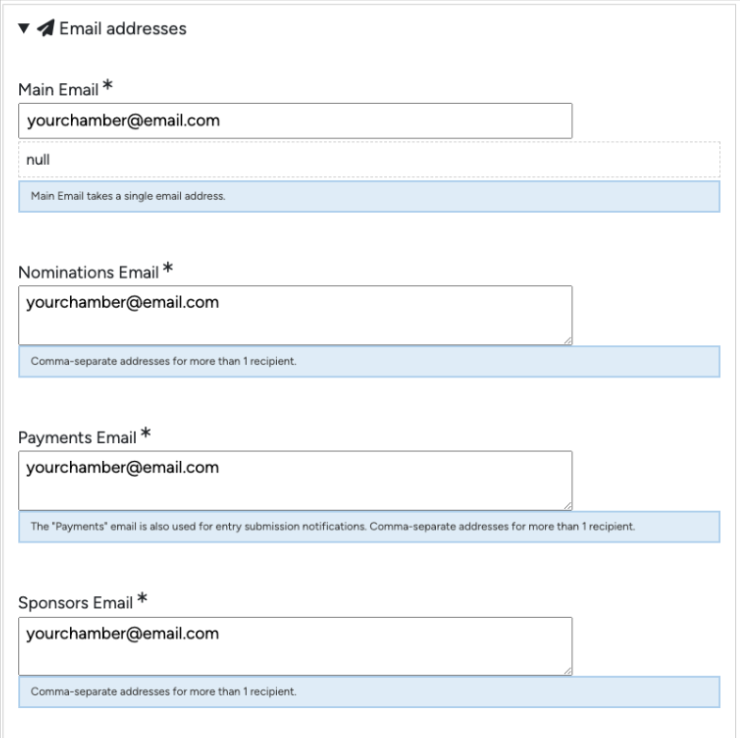
Next you can set your Contact Information including phone number, address and contact person. The email addresses have their own section, since there are multiple different notifications that are options as part of your awards season. For example, you may want the Payments emails to go to your Accountant, you can set that here.
Then you can link your social media accounts, which will populate as icons in your footer menu.
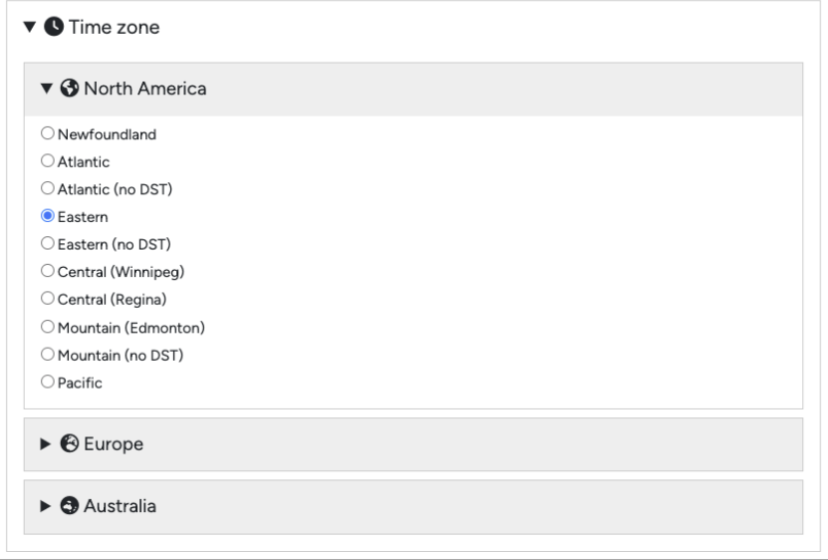
The default time zone is Eastern North America, so make sure to set this to your proper time zone so that all date settings and notifications will occur at the correct time.

Also related to location is setting the currency for any payments on your account, and the taxes you need to charge according to your region.


Awardify uses Stripe for online payments. We use Stripe because they are on the cutting edge of security for online payments, and they have a really nice front-end system to make the payment process simple for the end-user. Also, with Stripe you don’t have to remember to go into the account to withdraw your funds into your bank account because Stripe automatically rolls money into your account on a weekly basis.
It’s free to sign up for a Stripe account, and then (as all payment gateways do), they charge 2.9% + $0.30 on each transaction. So you might wish to consider the ‘cost’ of online payments as you figure out what to charge for entry fees, gala tickets, and sponsorships.
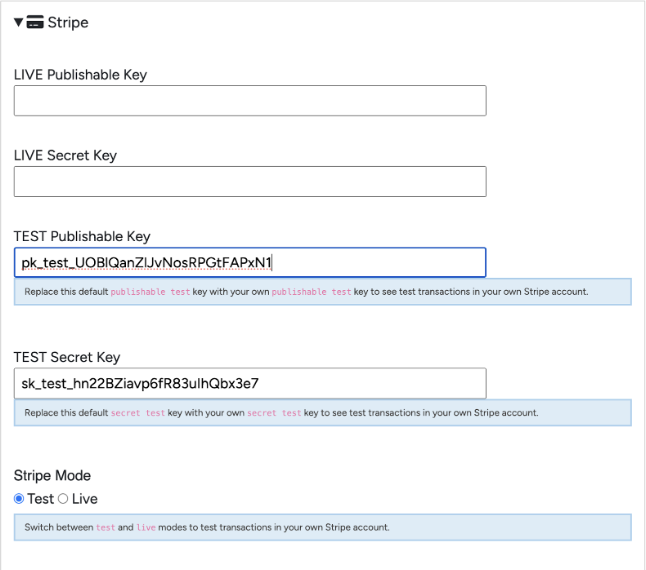
After signing up for Stripe, click on the ‘Developer’ link in the Stripe dashboard, then find your API keys. Copy the Publishable and Secret Keys and paste them into the corresponding fields in your Awardify Account.

You will see the TEST keys in your account by default. By pasting your own keys in the TEST areas you will be able to see test transactions in your own Stripe account.
Once you are done testing, be sure to change the final setting from Test mode to Live mode.
The next few sections are advanced settings for your nominations, entries, judging, voting and website pages, which will be a part of those corresponding videos and documents, so if you have any questions about them please check those out.
